George’s Box

DSCF0436DSCF0444

I had a request to make a small box (70mm x 50mm x 50mm).  I read through my various books on boxes for inspiration, but a lot were veneered with no fundamental joinery used and I also wanted something original.  So with that in mind I decided on the box above.

20131111_222818

I used Kiaat for the box and used a mitre joint with a hidden biscuit for strength.  I used the wood from one plank so the grain is continuous all around the box.

20131112_21551120131112_21563020131112_21301420131112_213022 

Apart from the radial arm saw used to cut the mitres and the biscuits to join them, the entire project was made with hand tools.

IMG-20131119-WA0011 IMG-20131119-WA0015

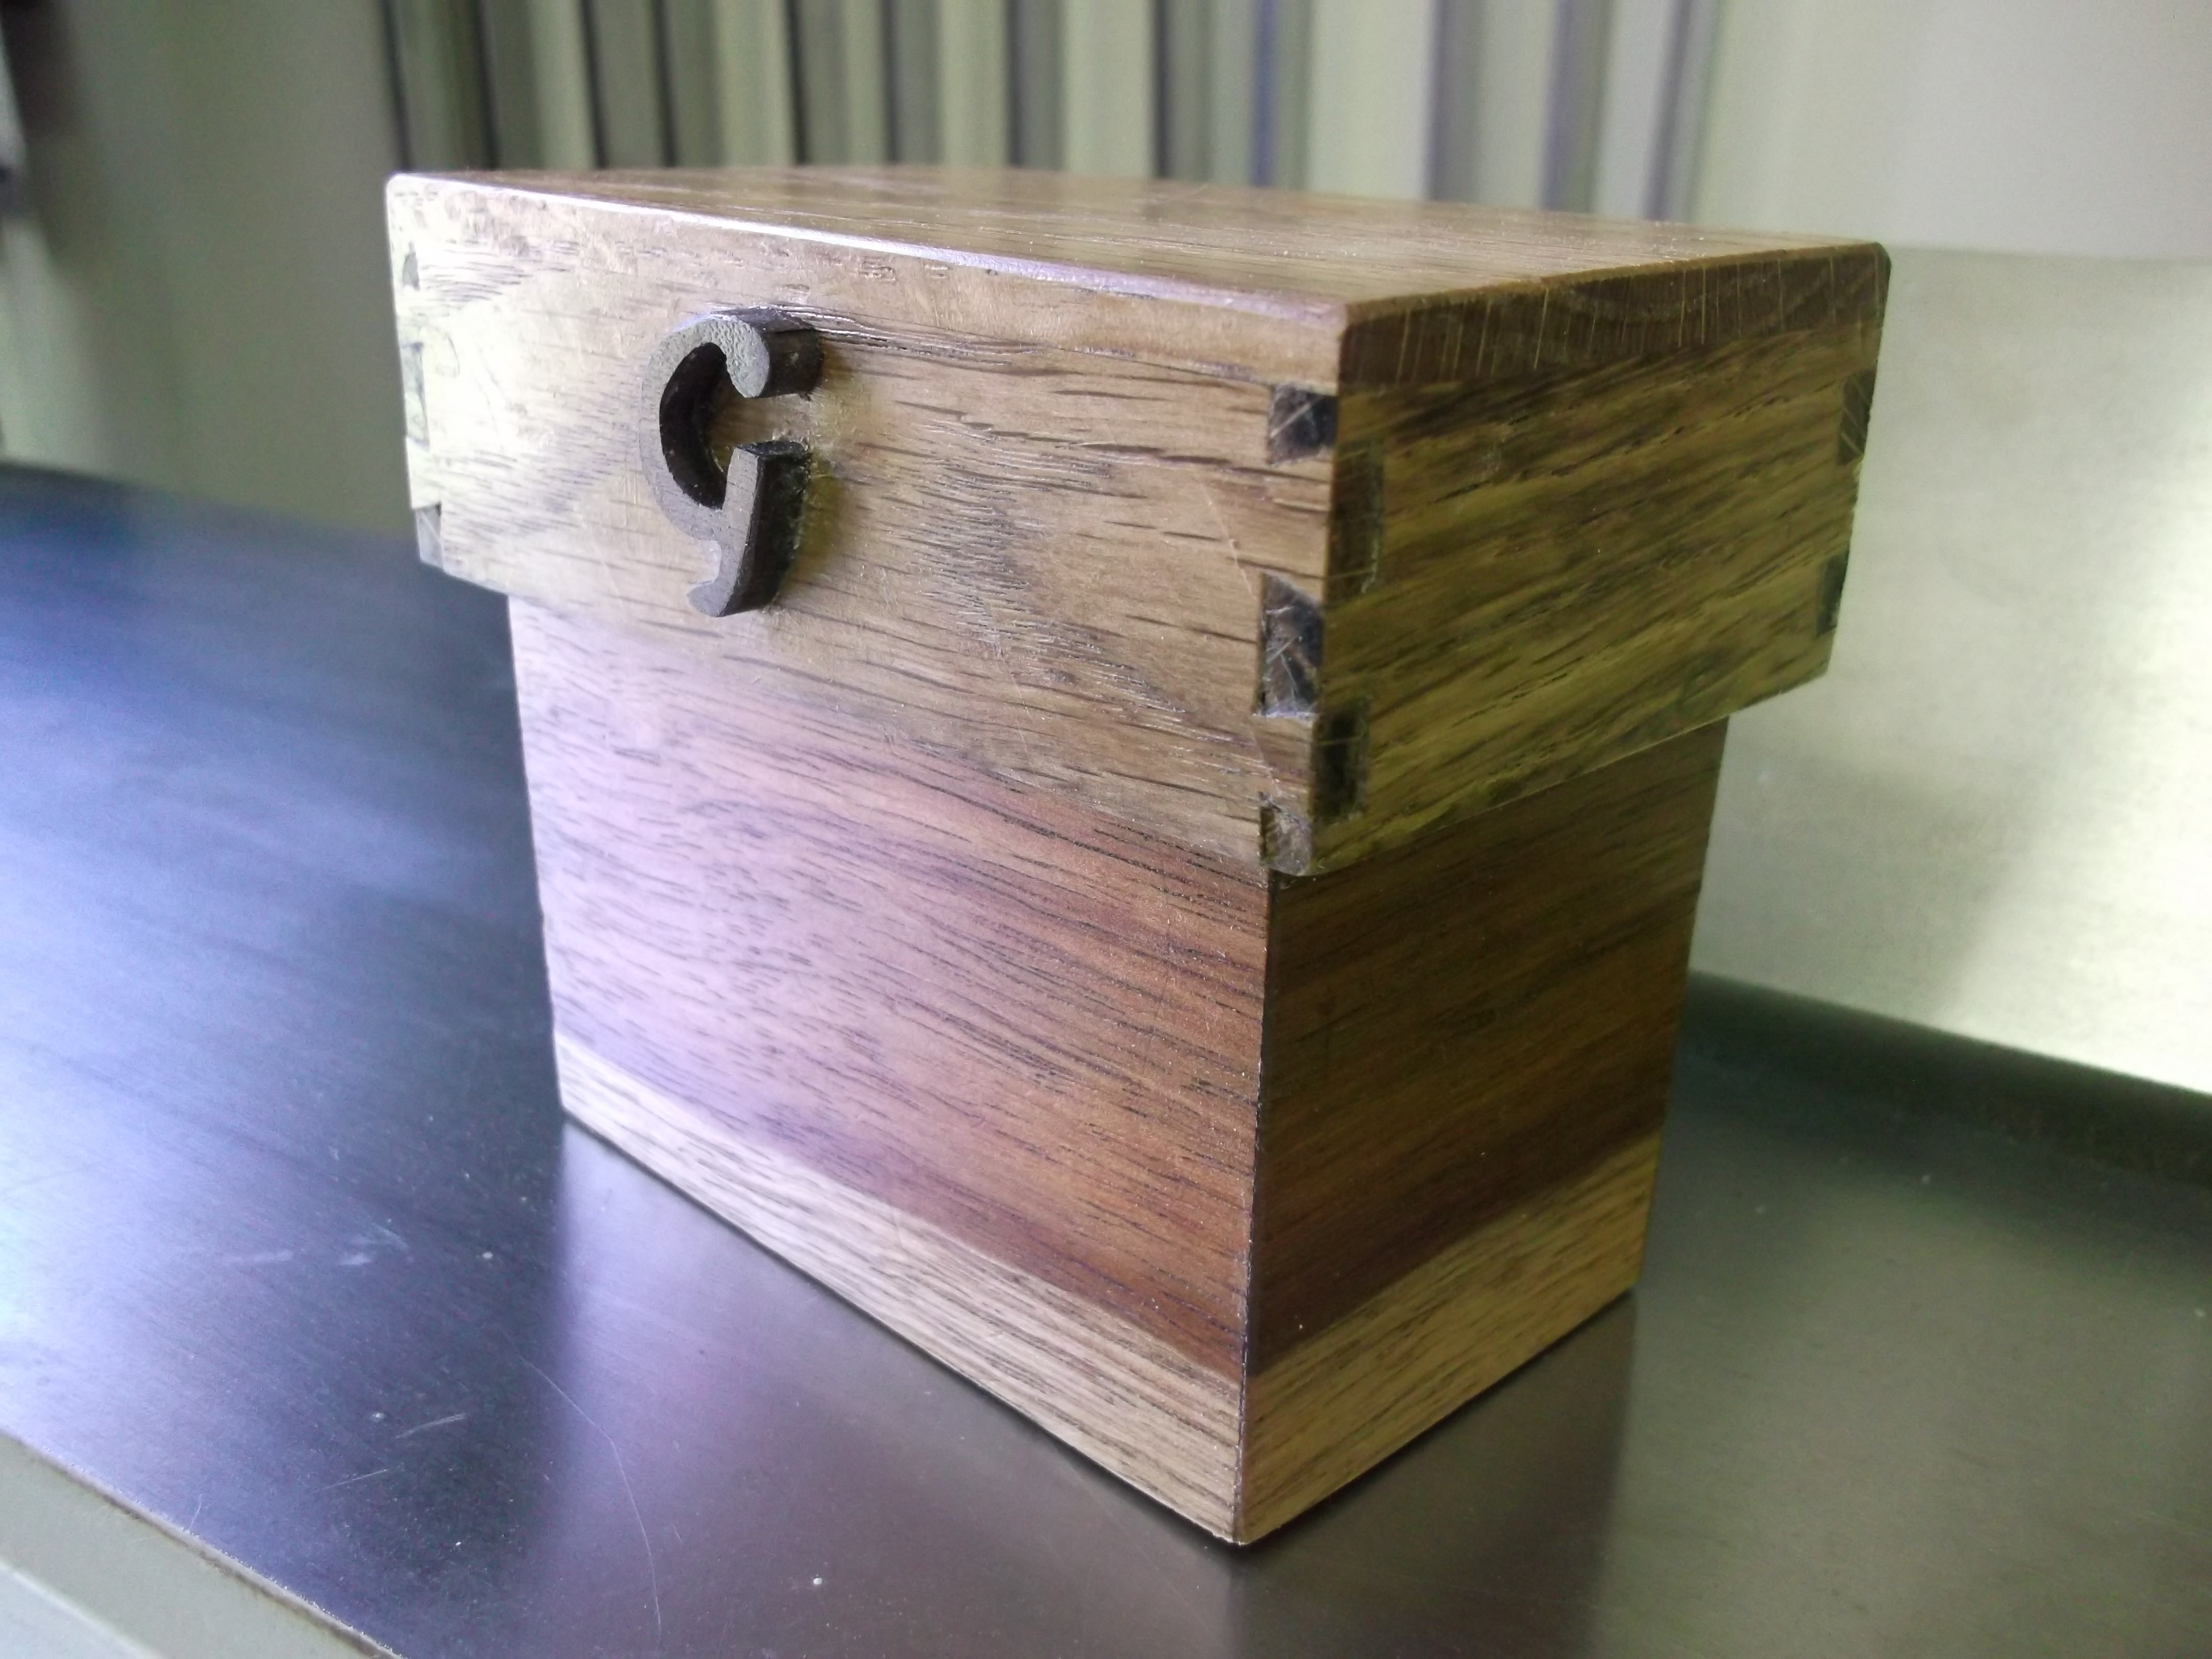
For the lid I used 4.5 mm thick white oak which was joined using hand cut through dovetails.  Because I kept changing the design, the box ended up looking top heavy.  It was also not fitting snug to the box, so in order to solve both these problems, I placed some oak spacers inside the lid which both raised the lid for better proportions, and gave it a snug fit.

DSCF0441 DSCF0443

The letter “G” was cut by scroll saw by my friend Astrid because my attempts looked like a bad case of Parkinsonism.  The finish was Danish Oil and wax.

DSCF0447

Toolbox for Leathercraft Tools.

In between projects and needed to practice my hand cut through dovetails, so I made this box to keep my leather-crafting tools.  I used South African Pine, which has a lot of knots but  is relatively cheap and easy on the tools’ edges.  I decided to make small trays of plywood that  stack on top of each other, as there are quite few tools and I didn’t want them to bang against each other.  The lid was frame and panel, the frame was mortice & tenon and the panel made from a local hardwood called Kiaat, was raised by hand with a Stanley #78 rabbet plane and a #5 Jack plane.

I cut the dividers for the tool trays with the help of my Bridge City Tools KM-1 Kerfmaker.  The next sequence shows the trays being stacked from the bottom up, first empty and then with the tools in place.  Finish with Danish oil and wax.


For the tray bottoms, some I left bare, others i covered in Skyvex-a nice thin imitation leather that bookbinders use, and some I stuck on some veneer offcuts.

Sawtill

I’ve always wanted to make one of these.  Not only because they look cool, but they are very practical, and if you own a few handsaws, you’ll know what I’m talking about.  Due to their size and shape, saws are difficult to store and they generally take up a lot of space.  You cannot stack them, or put them on a shelf, and they are too long for most cupboards.  Many woodworkers hang them off pegs around the workshop, but I find that untidy and a use of space that I don’t have.  The sawtill I made hangs on a French cleat quite high on the wall.  You can do this because you are grabbing the saw by the handle which is on the bottom end, and this in turn allows you the space to store tools below the sawtill.

I made this out of pine, under the supervision of a teacher.  The lessons learnt were very valuable (see my following two posts on hand cut dovetailed boxes), and being in an experienced woodworker’s shop is a lesson in itself-you get to see how they work, their work flow, their choice of tools etc.  My greatest personal benefit is from watching their style of working and their particular approach to a problem or technique which I compare against my own.